JournalTechnique
Low-key wildlife portraits: black backgrounds in daylight
How to photograph wildlife against a pure black background without flash or a studio: finding the light, exposing for the highlights, and finishing the edit.
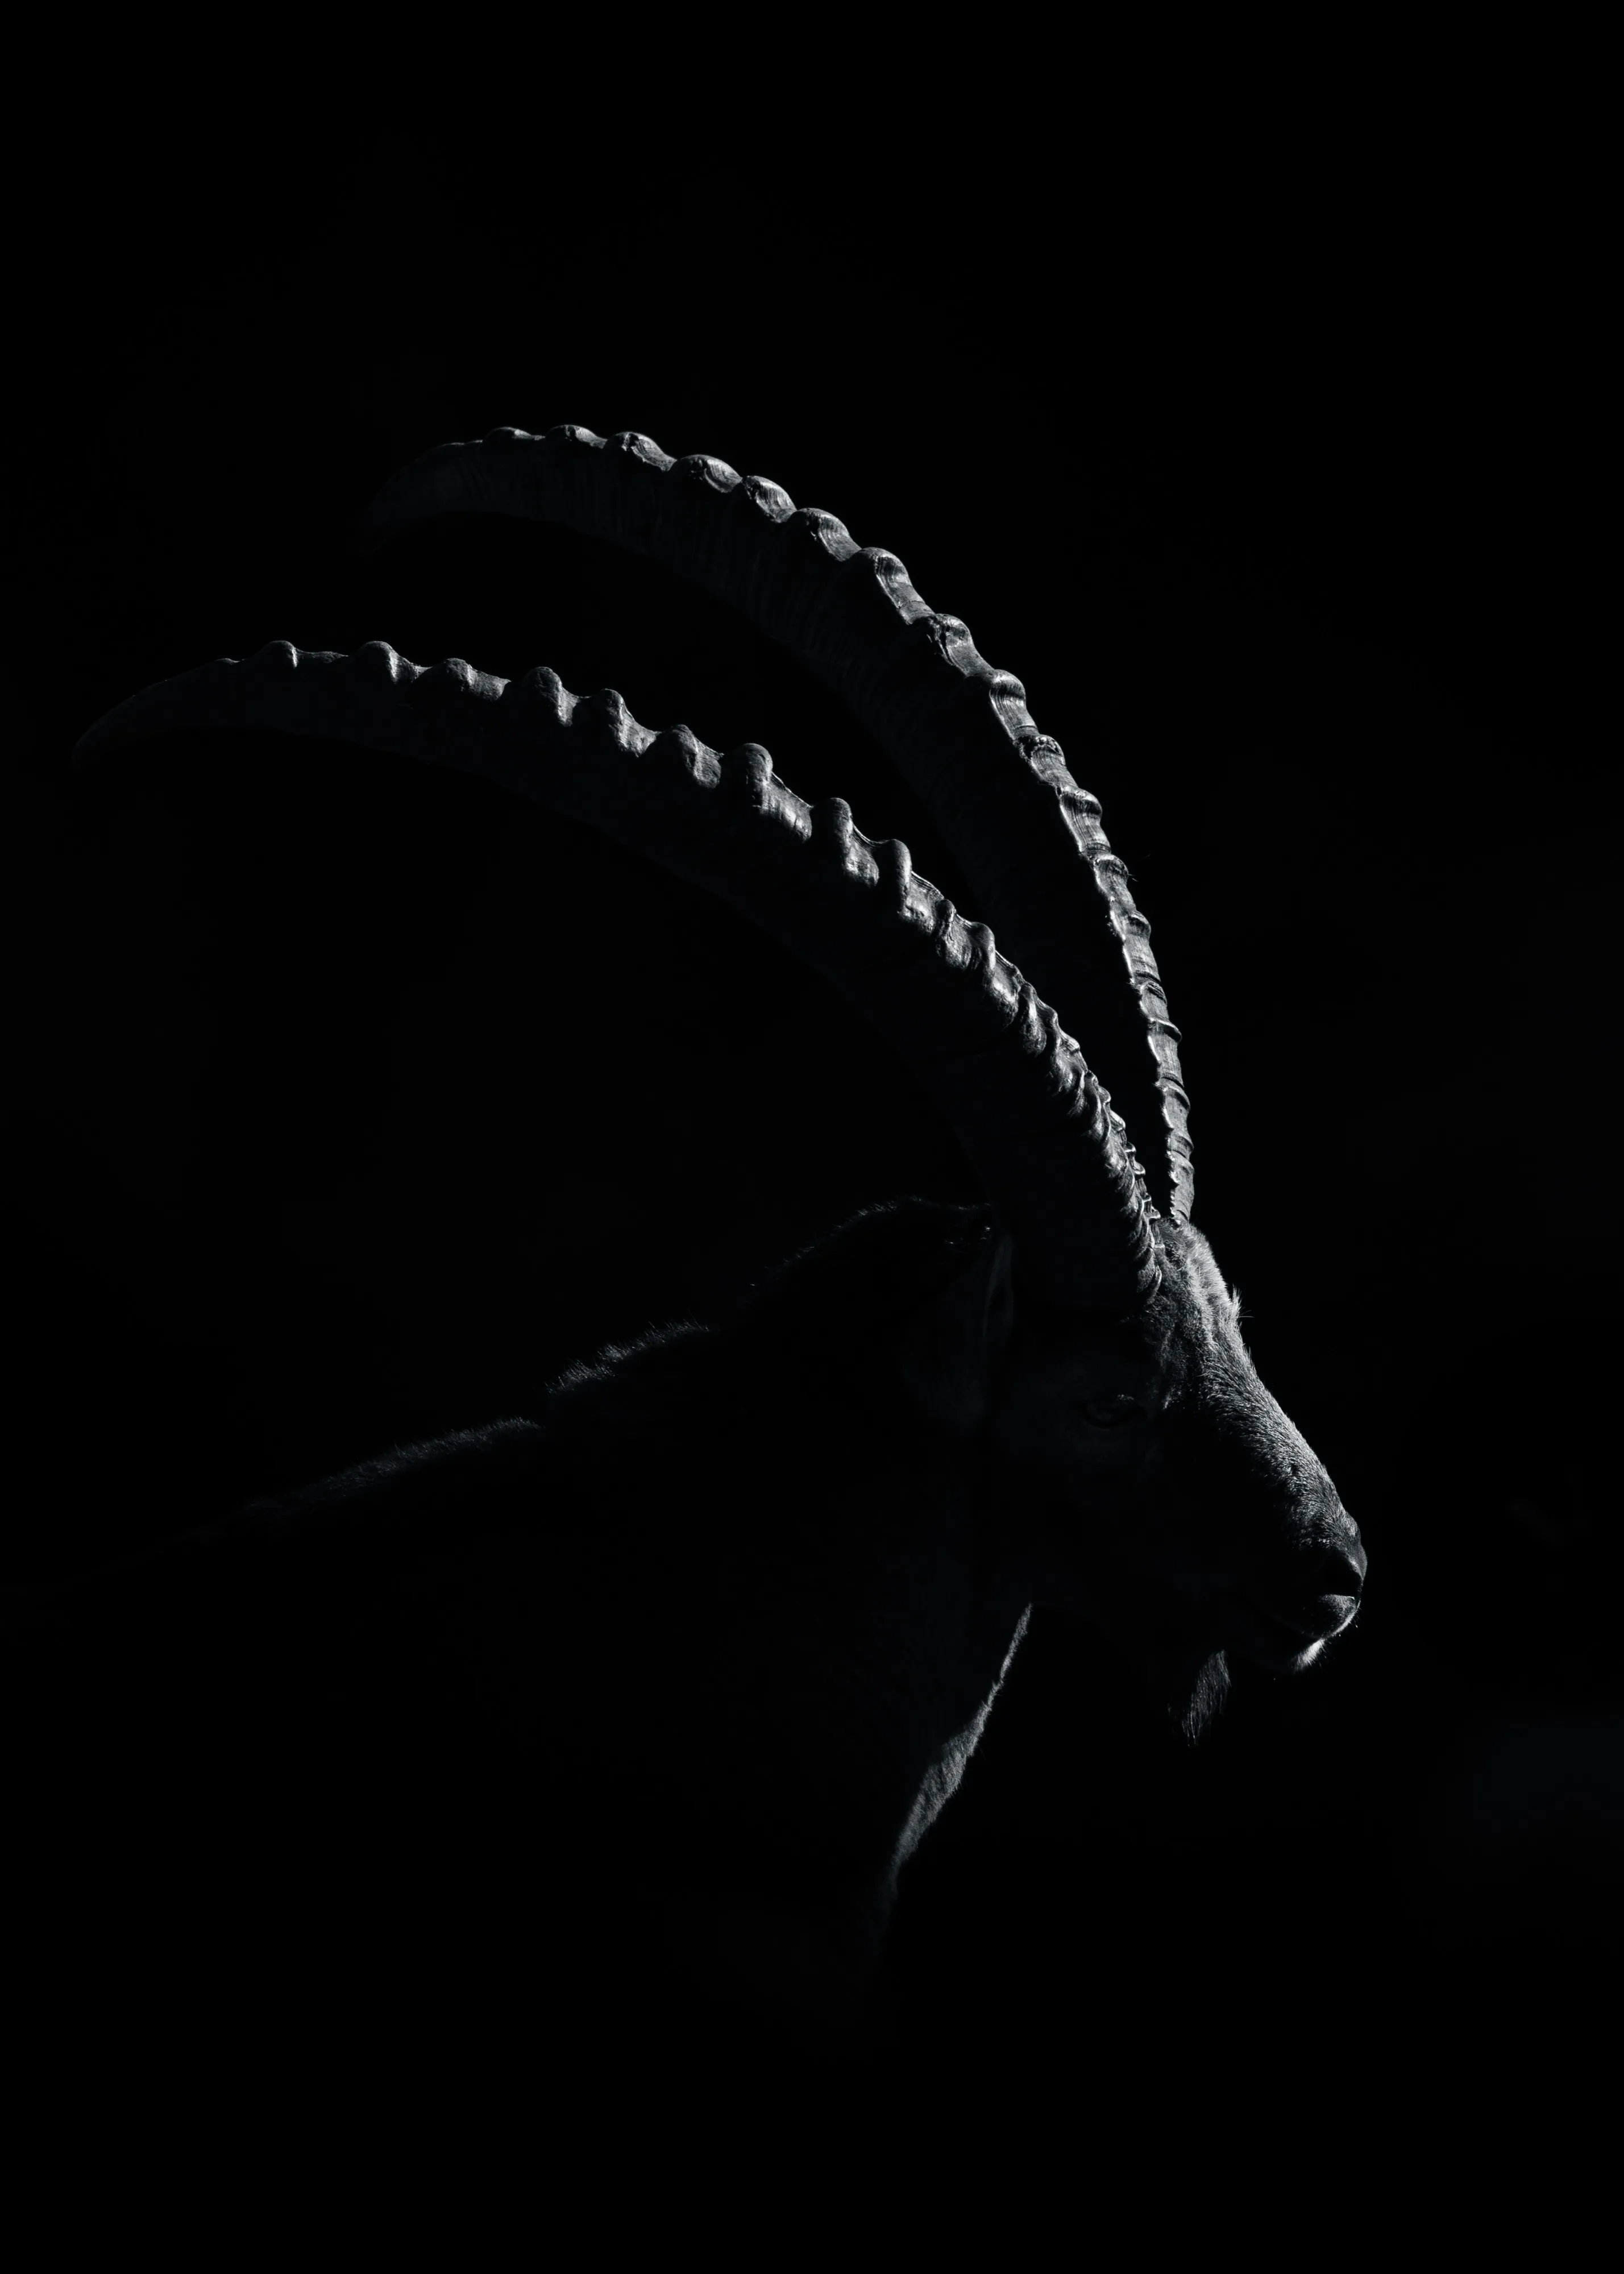
A set of horns drawn in light against solid black. A face looking out of darkness. Low-key wildlife portraits look as though they were made in a studio, yet they are taken outdoors, in daylight, with no flash and no backdrop.
The technique is simple once you understand it. What takes practice is learning to see the situations where it will work.
The idea
A camera cannot record very bright and very dark things in the same frame. Usually that is a limitation. Here it is the whole method.
You need an animal in direct light, in front of a background in deep shade. Expose for the lit parts of the animal, and the shaded background falls so far below what the sensor records that it turns black.
Finding the situation
Look for a strong difference in brightness between subject and background.
- An animal in sun at the edge of forest, with dark trees behind it.
- An animal on a sunlit ridge with a shaded mountainside behind.
- A bird on a lit perch in front of a shaded bank.
- Low sun from the side or behind, catching only the outline of horns, ears and fur.
The greater the distance between the animal and the background, the better. Early morning and late afternoon are the best times, because low sun leaves large areas of the landscape in shadow while still lighting anything that stands above it.
Overcast days do not work. Without direct light there is no contrast to use.
Exposure
Your meter will try to brighten the dark frame and will blow out the highlights. You have to overrule it.
- Switch to spot metering if you have it, and meter from the brightest part of the animal.
- Dial in negative exposure compensation: start at −1.5 and go as far as −3.
- Take a frame and look at the histogram. Almost everything should be piled against the left side, with a small tail reaching towards the right that does not touch the edge.
- Check the highlight warning. If any part of the rim light is flashing, darken further.
In manual mode the logic is the same: set an exposure that holds the highlights and ignore what the meter says about everything else.
A useful side effect is that underexposing gives you fast shutter speeds and low ISO, even in fading light.
Rim light
The most striking version of this technique uses backlight. With the sun low behind the animal and a dark slope behind that, only the edges catch the light: the ridges on an ibex horn, the fine hair along a back, the whiskers on a muzzle.
It takes careful positioning. Move until the sun is just out of frame and the background behind the animal is the darkest thing you can find. Use the lens hood, and shade the front element with your hand if flare creeps in.
Composition
With everything else gone, shape is all that is left.
- Profiles read better than animals facing the camera.
- Give it space. A small lit subject in a large black frame has more force than a tight crop.
- Watch the eye. A point of light in the eye brings the picture to life. Without it the animal can look flat.
- Keep it simple. One animal, one gesture.
The edit
A good low-key frame is most of the way there in camera. The edit is about finishing it, not creating it.
- Lower the blacks and shadows until the background is clean.
- Lift the whites slightly so that the lit edges stand out.
- Use a soft brush or a mask to darken any stray patches of grass or rock.
- Go easy on noise reduction. The dark areas contain no detail to protect, and the lit areas were exposed properly.
If you find yourself painting large parts of the frame black by hand, the picture was not there to begin with.
Good subjects to start with
Animals that stay still give you time to work the angle. The ibex on Pilatus are ideal, and the same approach works on chamois at the forest edge and on kingfishers perched in front of a shaded bank.